The Wanderer
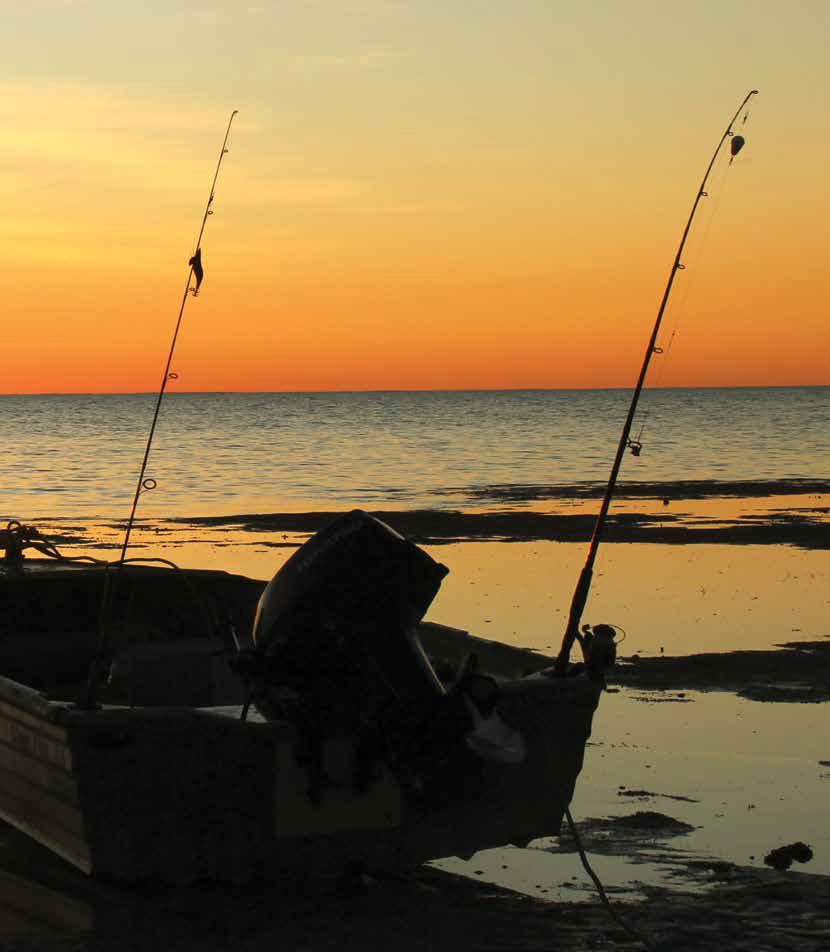
Colin Kerr practices the rule of thirds in this sunset shot
In times gone by, travel photography was pretty much limited to those who could get their head around compact cameras (often producing very mixed results when you finally got around to having your films processed) or, for the keen photographer, an SLR camera with a selection of lenses and filters.
Today, however, virtually everyone with a smart phone or tablet can be a quite proficient travel photographer. In fact, these new photographic devices - that allow you to instantly see your pics on the screen, produce quite high quality, high resolution images, and then share them through the internet with family, friends or the world through social media – have revolutionised the way most of us now look at photography. In fact, how many people do you see these days with traditional cameras? They are certainly in the minority!
The technology associated with this brave new world of photography is already quite well known by the millions of smart phone users, so I won’t cover that in any detail here.
What this feature sets out to do, however, is provide some ideas to help improve the standard, quality and presentation of your travel (and general) photography to a level where you will be proud to share, show off and enjoy even more of your photographic efforts.
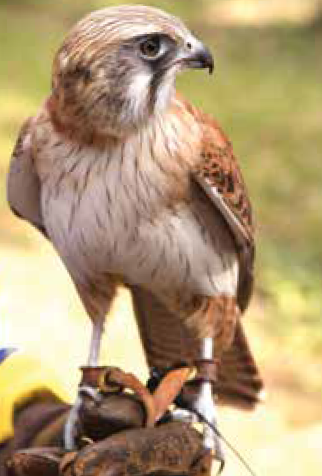
Get in close and fill the frame for specific subject matter
BE PREPARED
With travel photography these days you don’t have to worry about setting off with a pile of films or be concerned with airport x-rays, ect, but before you go, you do need to consider which chargers, leads and adaptors, ect you’ll need to take and how you’ll back-up your photos along the way.
Also think about the type of photos you’re going to take on this trip – e.g. are you looking for iconic images (landscape scenes, buildings, animals, ect) or do you intend to photograph local people, culture and lifestyles, ect, and will you want to be in some of the photos to show you’re enjoying the place. Perhaps for a good general record of your travels you’re after a combination of all of these.
GET IN CLOSE
One of the biggest mistakes most of us make when photographing a scene, building, person, animal – in fact, almost any subject – is that our pics don’t fill the frame with what is important. The message here is to move in closer or zoom in to what is of most interest (the main subject), and unless something actually adds to your photo, cut out all that clutter around it. Also watch out for things in the background that might be distracting to your main image, e.g. poles, bins, signs, reflective glass, etc. This will give greater emphasis and detail to your main subject which is no doubt the highlight of what caught your eye in the first place! Generally however, avoid using telephoto lenses for scenes, etc, unless you are shooting wildlife or a distant object and can’t get any closer.
Bear in mind, though, that in some circumstances the image you want to capture is a wide vista, in which case a wide-angle shot is the right choice. Having something of interest in the foreground (perhaps using lead-lines like a row of trees, rocks, a roadway, etc.) will add depth, sharpness and dimension to your shots.

The rule of thirds allows space for subjects to move into the picture
KEEP YOUR COMPOSITION
With very good reason this is one of the most important things to think about when taking (or should I say ‘making’) photographs. In landscape photography, and in other pics, it’s useful to remember the ‘rule of thirds’. The idea is to use imaginary lines to divide your image into thirds vertically and horizontally, then place your centre of interest on one of these intersecting lines. For example, with landscape pics, have your horizon about one third down from the top, or if the sky is the most important part (e.g. sunsets, sunrises) have mostly sky and very little ground in the bottom of your photo. If you like including people in some of your landscape pics, place them over to one side, preferably looking into the scene. Similarly when photographing people or animals, allow slightly more space in front of them than behind – not always slap-bang in the middle of your image.
This principle also applies to moving subjects – always allow space in your pic for them to move into the frame; don’t have them looking like they’re heading out of your photo. Also try to keep your horizons straight. Unless you’re trying to achieve some special effect, sloping horizons just don’t work.
Remember, though when we talk about photographic ‘rules’ or guidelines, they can be broken. It very much depends on your subject and how you have envisioned your intended image in your mind. While the thought you put into composition can very often make or break a photograph, the most important thing is that you think about the image and the composition before clicking away.

People can add more interest to scenic landscape photos
WHAT’S YOUR ANGLE
All too often when taking photos we simply stand and shoot. In many situations this is quite OK, but sometimes changing your perspective, eg. getting down low and shooting slightly upwards, or looking for a higher vantage point, such as a hill, ladder, tall building, ect, can work well. Yes, a bird’s eye view or a worm’s eye view can often produce a more dynamic look and feel to your image.
Also keep in mind that when photographing children and animals, try to photograph them at their own (eye) level, which in many cases will involve you squatting or bending down to get more natural photos. Just experiment with these ideas and see what a real difference it can make to your pics.
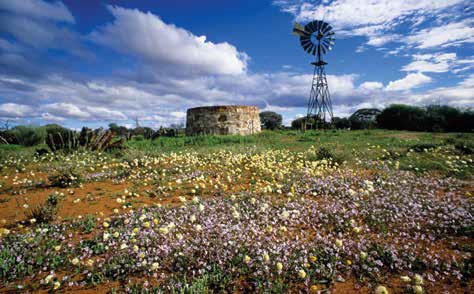
This landscape shot draws the eye in towards the windmill
IT’S NATURAL
Whenever possible use natural light to your advantage – get up early to enjoy the warm, soft and beautiful light just before and after sunrise. The other magical time of day is just before or after sunset. In the middle of the day we often see colours bleached/washed out, but those early or late pics can be really amazing. Also at sunrise and sunset, check out the scene behind you. The sky and landscape opposite the sun is sometimes where some beautiful transformations are going on – look for those lovely pastel pink and blue hues.
NOTE TO SELFIE
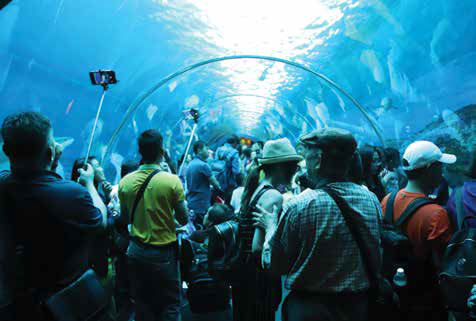
Everywhere you go these days there are people taking ‘selfies’ with or without selfie sticks! This relative recent art form has really caught on and is a great way to simply get a record shot of you (and perhaps your family and friends) at a particular spot. Such photos, however, are often a little distorted (too close), not well composed and look slightly awkward – but they are mostly just record shots after all!
If you have the opportunity and time, however, and you want to be in the pic, it is usually much better (composition/distortion, etc.) if you ask someone nearby to take the photo for you. Tell them what you want and check on their work by quickly reviewing the photo afterwards.
Another handy hint when taking people pics is to watch out for harsh shadows on their faces, such as those cast by a hat. Use your camera’s flash (yes, even if it’s daylight) to fill in the shadows created by the sun. You’ll be surprised what a difference this will make.
A low angle can result in a more dramatic photo
ON THE STREET
When travelling, you must be careful when taking photos of locals and strangers unless they are just a small part of a general scene. In some places (particularly overseas) taking close-up photos of people is really frowned upon, so be respectful and always ask permission. You’ll generally get a much better photo (ideally with eye contact) than you would achieve with a quick and sneaky ‘grab shot’.
Sometimes, a photo of locals engaged in their work, craft, etc) can make a great image. Generally try to use natural light and, as mentioned above, a fill flash can be useful if there are shadows or low light.
When walking the streets, it’s often better to look casual, and try to blend in with those around you, then just quickly raise your camera (phone, etc.) when the image you’re after presents itself. Big lenses and tripods in this situation are generally not a good idea and will make you very conspicuous.
Another option is to find a place to stand or sit with clear vision, the sun behind you and a suitable background and wait for your subjects (people, cars, bikes) to pass in front of you.
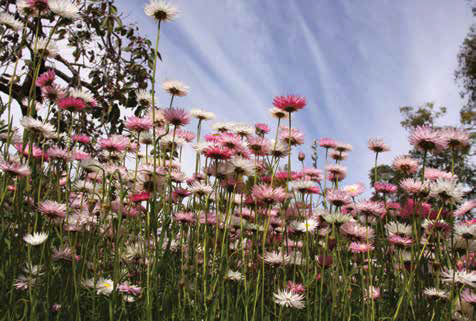
An example of a well balanced photo using natural light; Selfies using selfie sticks
MORE IS MORE
Very often with travel photography you only have a short time to get that special photo before you move on to somewhere else. When you have the opportunity, try to take plenty of pics (you can always delete unwanted ones later), perhaps from slightly different angles and with varying compositions, perhaps scenes with and without people and, if time is on your side, try taking pics at different times of the day. For keen photographers, or those with more experience¸ try taking your camera off automatic (if that’s an option) and varying your camera settings, such as shutter speeds, f-stop openings or ISO settings). You can also try a polarising filter, for example, to make blue skies more vivid, or a neutral density filter when lighting/contrast conditions are difficult. If you do carry a tripod, you can use it to eliminate camera shake and to make better panning and panoramic shots.
BACK-UP PLAN
When travelling it is important to back-up your photos as you go. We have all heard of people who have lost all of their photos for one reason or another – wiped off in error, faulty/corrupt/or lost memory card, damaged/lost their phone, etc, etc. Whatever the reason, the loss of valuable photographic memories can be devastating. So whenever you have the opportunity, even once a day, try to back up or duplicate your pics on to a flash drive, CD, external hard drive, ect. or send them to the Cloud or Dropbox, ect from where you can access them and download to other devices. That way your pics will be stored in at least two different locations. Better to be safe than sorry!
LIVING MEMORIES
There are more and more options for sharing your photos these days, including Facebook, Instagram, the Cloud, through your own travel blog, etc – all a great way to keep friends and family informed and help them share your experiences.
Once you’ve returned to home base however, you shouldn’t let your photographic memories languish on your phone, memory cards, hard drive, computer or elsewhere. Make sure you do something to bring back to life all those precious travel moments to enjoy yourself and/or share with others over and over again. A great option for bringing those travel memories back to life so you can enjoy and share them over and over again, is to create your own bound photo album (a coffee table style book) that will always be handy for showing off the highlights of a very special trip. There are several sites that provide this service via a quick Google search.
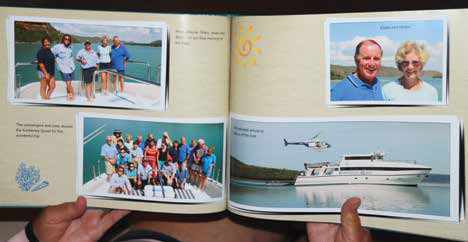
Turn your travel pictures into a photobook
Another option is to turn your selected images into a modern day ‘slide show’ that you can view on your computer or TV, via CD, DVD or USB flash drive.
These days, the ability to produce high quality travel photos is readily available to us all. The digital revolution has opened up a whole new world of photography, but it still needs someone to create the image. And the more you think before your click, the more you’ll be rewarded with better results. Try these ideas and bring back some wonderful photographic memories from your next travels.
Category: Features
Written: Fri 01 Feb 2019
Printed: February, 2019
Published By: